
New Henna Design
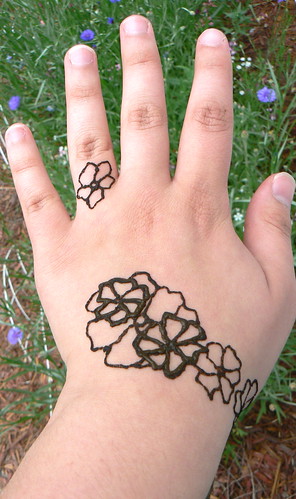
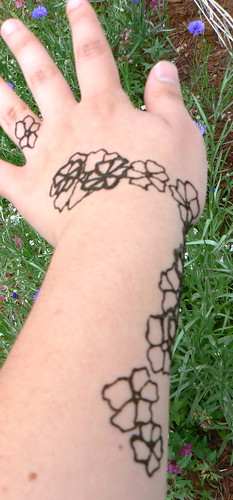
Here are two new henna designs I have done lately.
Enjoy!
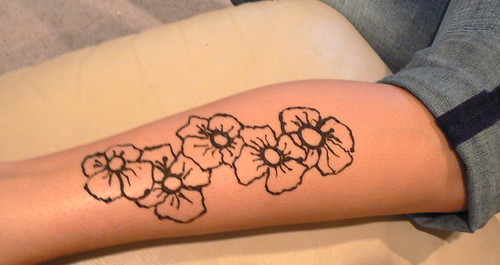
on Shalisa’s leg
<3 *Kelly*
Here are two new henna designs I have done lately.
Enjoy!
on Shalisa’s leg
<3 *Kelly*
I am totally blessed and happy with my life. Of course there are ups and downs, but there are too many wonderful things to let anything keep me sad.
Life lately has just shown me how truly grateful I need to be for the big things like my supportive husband, perfectly healthy happy baby boy, my humble house, my working legs & arms and the smaller things like the flowers I planted outside, chocolate milk, carpet and stickers.
There are few better ways to enjoy your life than to inspire others to a appreciate theirs, too.
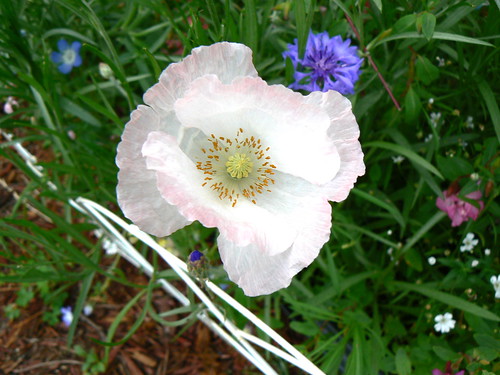
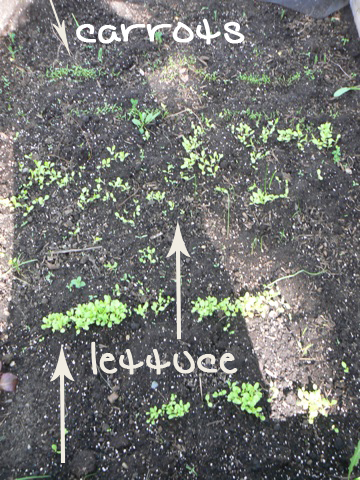
Here are some recent pictures of the garden and life around here lately.

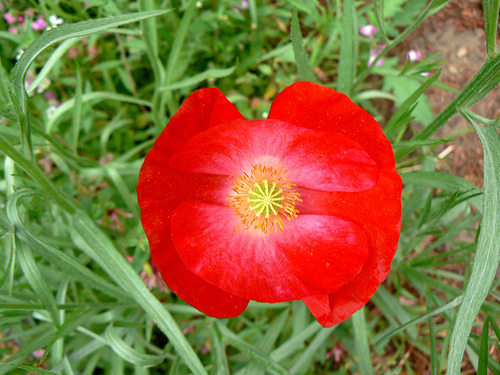
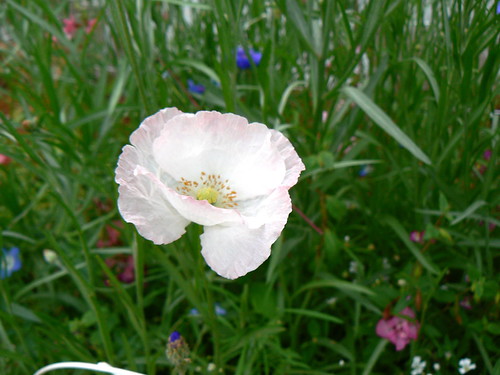
This is a red poppy. I love that its such an intense color, but its less than paper-thin and fragile.
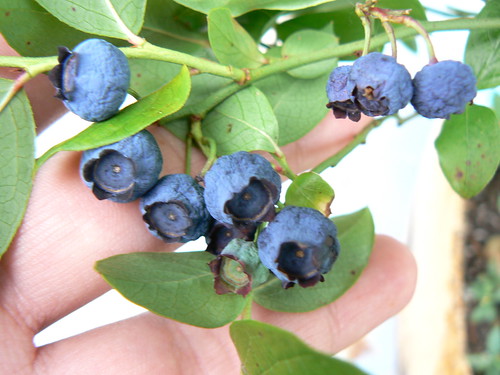
a sprig of blueberries that are coming in nicely
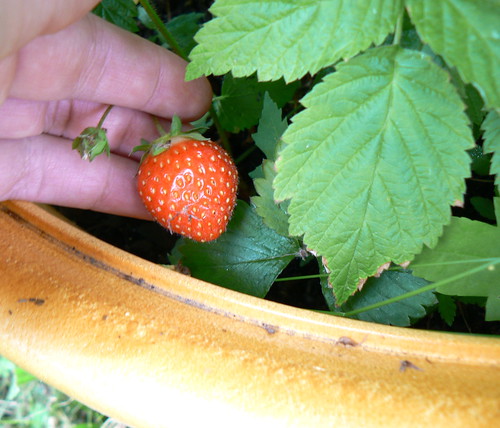
The strawberry plant that is roommates with the raspberry bush.

Wildflowers from the garden. Also, this is a great holder for flower. I made it with a regular teacup. The teacup I got for Mother’s Day. (this would make such a cute gift!)
*Kelly*
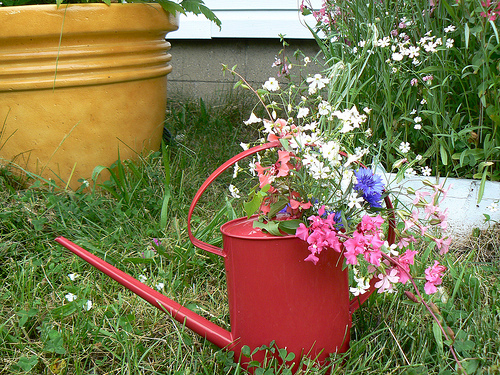
Today, Shalisa and I went flower picking in my garden this afternoon. It was the perfect day to use the new watering can. This is what we came away with.

Enjoy your day!
*Kelly*
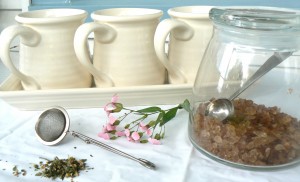
Today I woke up to find these three Katie Brown “cozy mugs”, as I call them. Nathan surprised me with them and this great ceramic square plate to house them. I wanted one for Mother’s Day, but when we got home, the mug we thought we got wasn’t in our bags 🙁 .
But today he got me two others, along with mine, so I can have two friends over for tea! Wanna join me? ? 🙂

Chamomile anyone? <3

Judah and Nathan

They are the best thing I could imagine. <3

*Kelly* – happy & blessed mommy
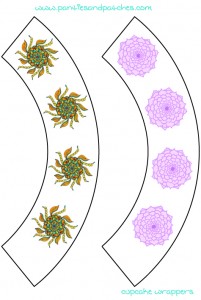
I was thinking about cake decorating & cupcake decorating recently. I have a huge respect for cake decorators (professional or hobbyists). I want to decorate cakes for a hobby one day when I have more time. Until then, a quick and easy way to decorate cupcakes (essentially tiny cakes) is to use cupcake wrappers.
There are a few cupcake templates online. With these templates, you can use the template to cut out cupcake wrappers from decorative card stock or scrapbook paper or print them directly onto white card stock and use my designs.
The size is for the standard cupcake size.
Supplies :
*Cupcakes in their paper cups they were baked in
*Card stock and/or scrapbook paper
*scissors
*tape or hot glue
Step 1: Print the wrappers onto card stock
Step 2: Cut out the wrappers along the outside lines.
Step 3: Attach the two ends, slightly overlapped, with tape or hot glue.
( I prefer tape just because glue around food makes me nervous)
easy peasy!
ENJOY!
Cupcake Wrapper Flower Template

Cupcake Wrapper Swirls Template

Cupcake Wrapper Hearts Template

*Kelly*
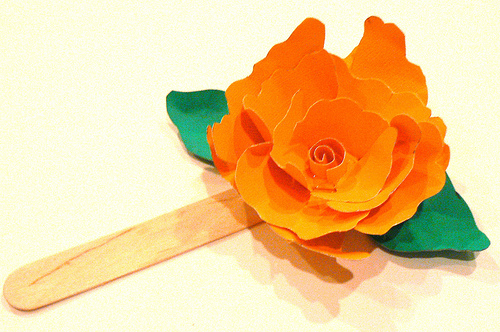
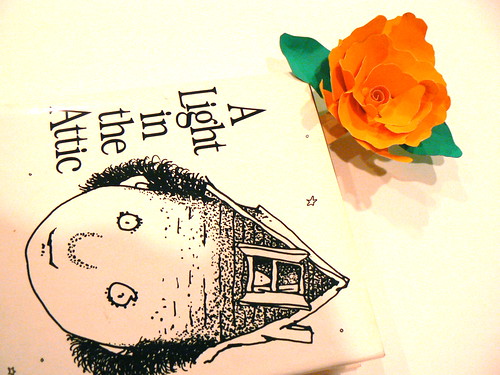
I’ve gotten a few questions on how I made the flower top for the Journal Jar. I put together this quick tutorial for the flower and made a bookmark out of it. I also created a pattern for the petals & flower so you can download and print it! You can expand on this, making it as large as you want or as small as you need.

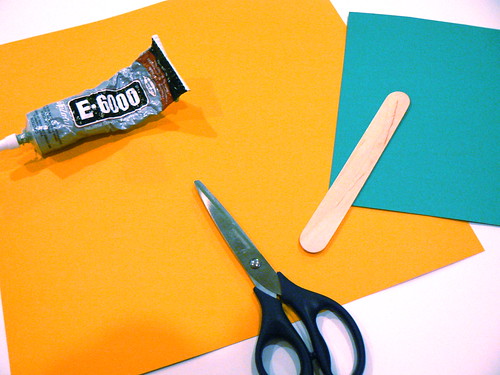
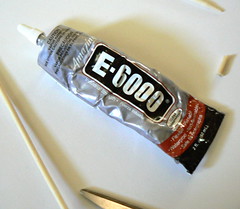
Step 1: Gather Supplies
*card stock for the petals & leaves
*scissors
*E6000 glue
*popsicle stick
*the petal pattern
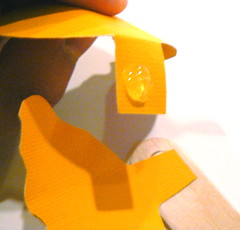
Step 2: Cut out all the pieces from the pattern
Step 3: Start assembling. Curl and bend the pieces to make them look more realistic (or not, and make a 2D flower). Glue the tail pieces to the stick.
Step 4: Make the 4 large petals look similar to this, then as you place the middle petals, off set them to make it add the the realism.
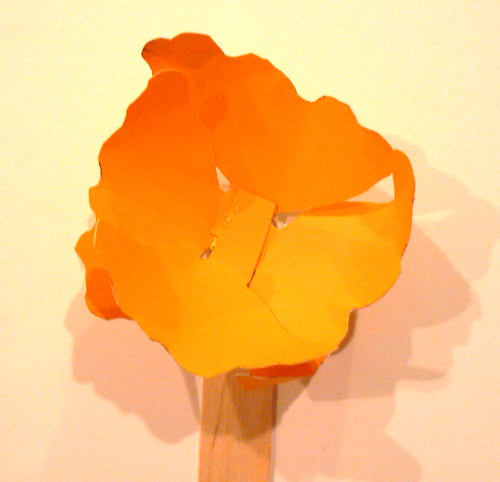
Step 5: Curl the center piece and glue it together with a dap of glue. Then add it to the center with glue.
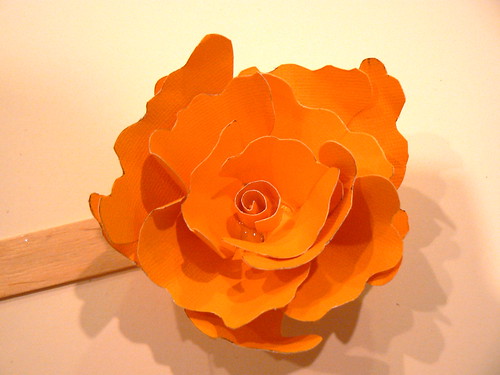
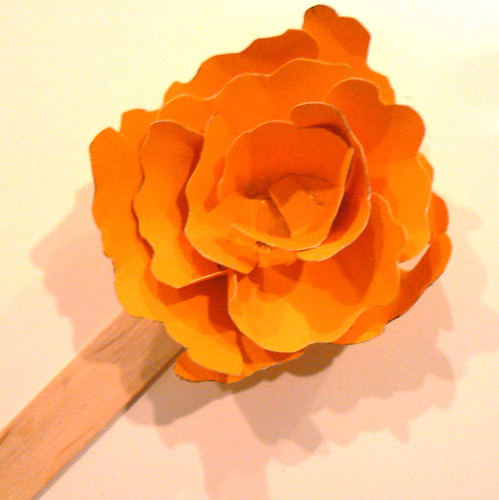
Step 6: Add the leaves. Crinkle them and put the glue on the tail piece and slide it under the flower onto the popsicle stick.
Step 7: Enjoy your new bookmark!
*Kelly*
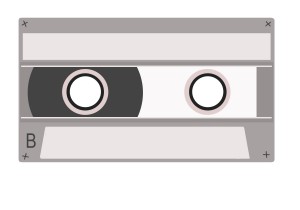
It only costs $0.28 to send a postcard! I didn’t know that. In celebration of finding out that information, I decided to design a few. These are PDFs that you can print out on cardstock (that fits the specification of the postcard definition, and an index card thickness is thick enough)
Tonight I did an artsy photoshop rendering of a cassette tape on a postcard-sized canvas.
You can use it for a postcard, even a fun birthday card . Just fill out the TO & FROM on the peachy-colored parts!
Specs for a postcard:
▪ Rectangular
▪ At least 3-1/2 inches high x 5 inches long x 0.007 inch thick
▪ No more than 4-1/4 inches high x 6 inches long x 0.016 inches thick
▪
▪ What is high? What is long? Length is the side parallel to the address. Height is the side that is perpendicular to the length. betmaster fogadóiroda

Click here to download the printable PDF!
*Kelly*
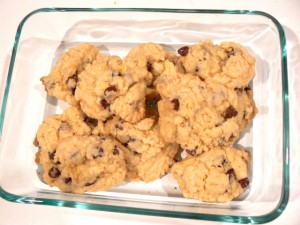
Last night I made organic Dr. Oetker cookies and since they came out so well and we had Calder’s milk, I couldn’t resist taking a few pictures..


now go make some, too 🙂
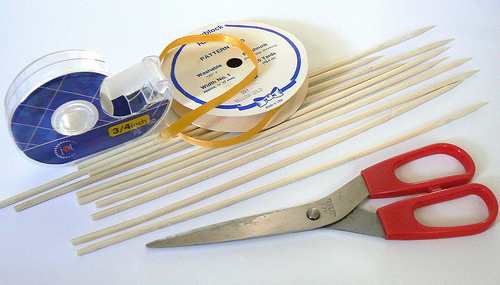
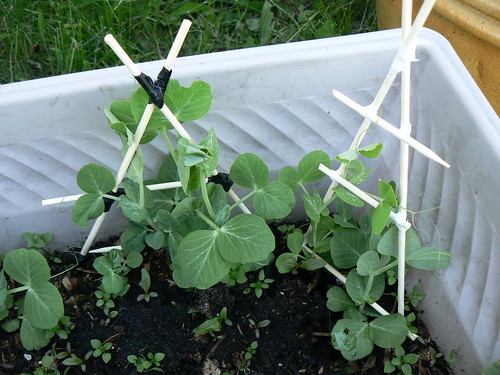
I am growing lots of pea plants, and I saw the little tendrils reaching and grabbing any twig they could find. I realized these little seedlings need something to climb on, and since they are too small from a big trellis, I decided to make tiny trellises. It only took me 30 minutes to make three different trellises, take the pictures & I squeezed in some Judah play time in there, too, so these don’t take long to make.
The ten minute trellis tutorial:
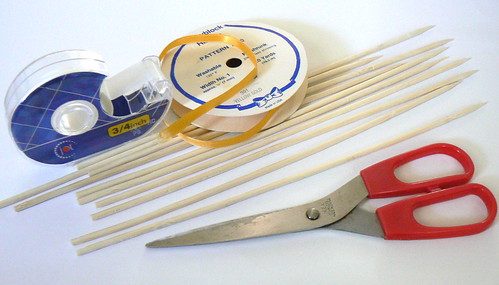
Step 1: gather supplies. You can use a variety of materials to lash the trellis together. I tried three different methods: clear tape, ribbon & glue, and electrical tape.
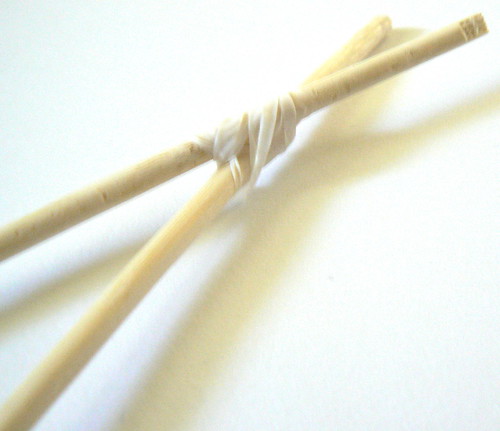
The first one I tried was the clear tape. The concept is the same, regardless of the materials.
Step 2: I put two of the skewers together so they made a small X at the top. I put the pointy ends down, so they go in the dirt better.

Step 3: Here’s the idea of lashing them together. Basically an “over, under & around” method.
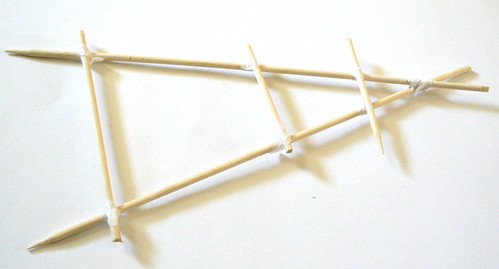
Step 4: This one was made with only 3 skewers, the two on the sides & the other split into 3
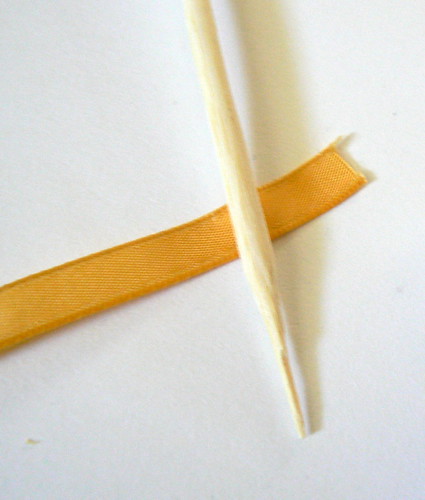
Here is the variation with the ribbon, using E6000 & spare ribbon.
You should lash them together like step 2 & step 3 show.
You start the ribbon at the end by glueing it.
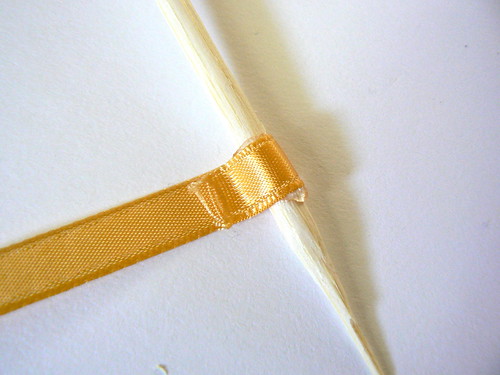
let the glue dry. Then wrap the ribbon around the skewers, glueing as you go.
and presto!
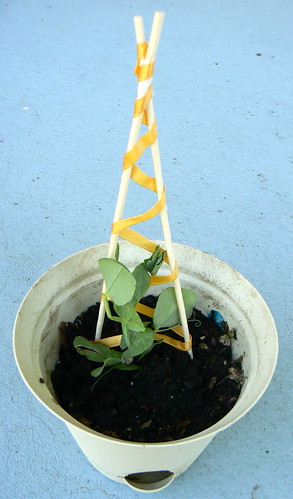
Here are the two other, really simple ones.
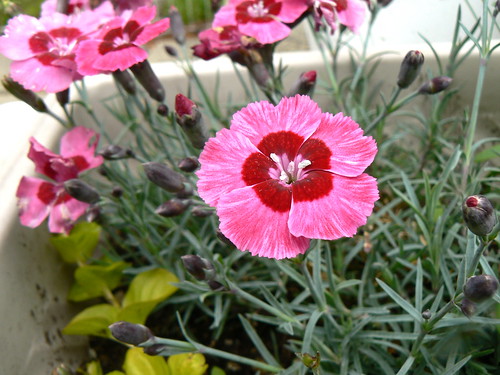
And a picture of the Phlox, for fun!
*Kelly*

Simple is sometimes better. ..
Yesterday was the Relay for Life in Southgate, MI. My sister works for the American Cancer Society and I always go out to her events that she plans. This year there was a trick-or-treat lap for kids to walk around and get candy. I found out about it two days ago, so I didn’t have much time to plan.
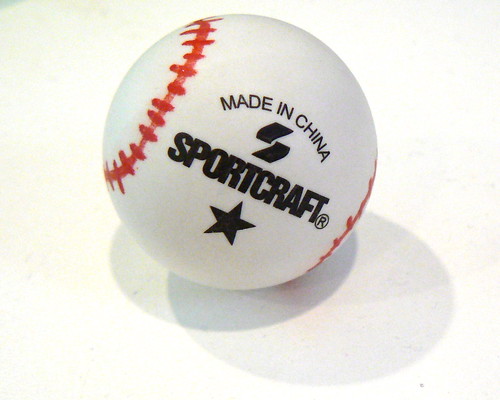
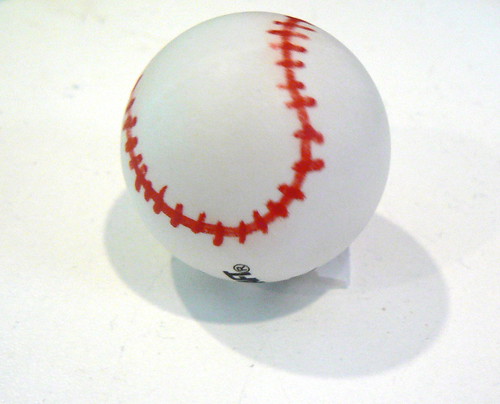
Judah hasn’t had a Halloween yet, because he’s only 3 1/2 months old, so he didn’t have a costume. His great-aunt had bought us a little baseball outfit for him, so we went with that. I was going to make him a plush baseball to carry, but Nathan suggested a little ping pong ball. It was perfectly to his scale. So I just washed off the ball, drew lines of a baseball on it with a paint marker, and there he had a little baseball!
here it is:
and here Judah is holding the baseball, with me and the whole outfit outside our house:
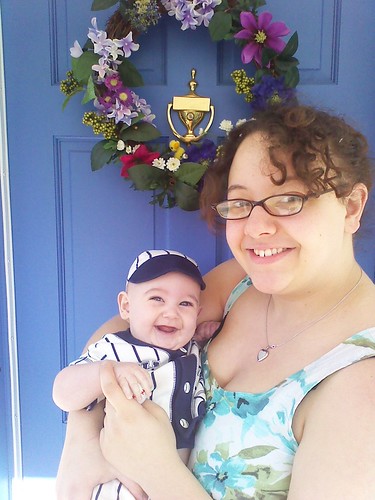
He got so many compliments yesterday, I’m so glad he could bring joy.
I’m writing this to say that even some of the simplest crafts make something so much better. ;D ;D
*Kelly*
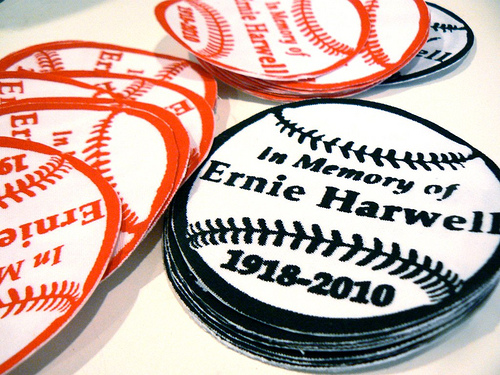
This week I did these commissioned patches for the American Cancer Society. They are in honor of Ernie Harwell, a man I didn’t know much about until this week, even though he was a very popular gentleman here in Michigan. “He was known for his long career calling play-by-play of Major League Baseball games. For 55 years, 42 of them with the Detroit Tigers, Harwell called the action on radio and/or television. In January 2009, the American Sportscasters Association ranked Harwell 16th on its list of Top 50 Sportscasters of All Time.” He recently passed away due to bile duct cancer at 92 years old.
To raise money for the American Cancer Society, I was asked to design & do these iron-ons.

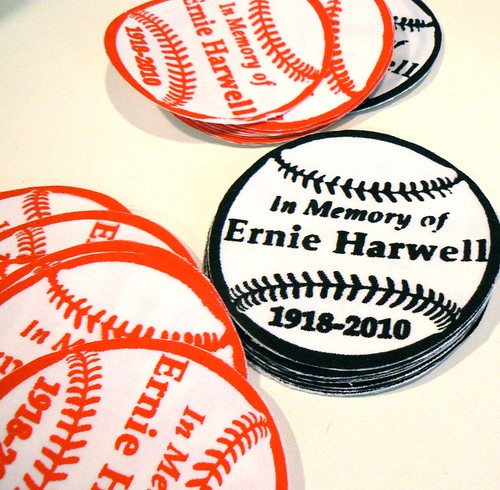
“I think I owe thanks to the people who have listened to me over the years, who tuned in on the radio. They have given me a warmth and loyalty that I’ve never been able to repay. The way they have reached out to me has certainly been the highlight of my life.”- E. Harwell
*Kelly*
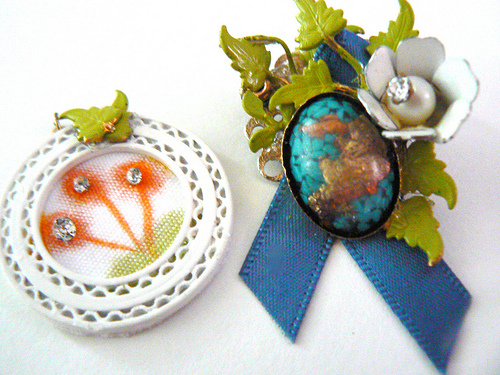
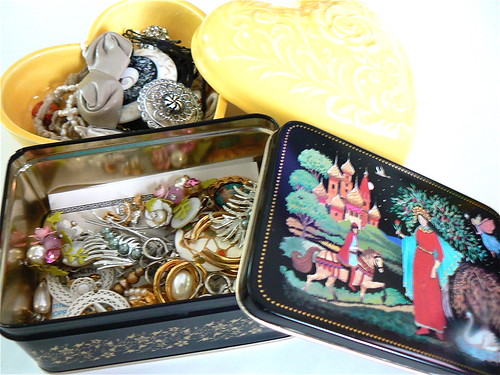
I have lots of small bits around the craft space, and to utilize some that are under the category of “I’m going to need that some day..”, I made a simple brooch & medallion.

For the brooch
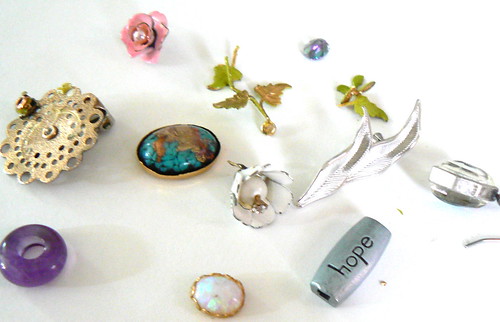
Step 1: gather supplies – pin backing, needle-nose pliers, scissors, E6000 glue, markers, miscellaneous bits of old jewelry, broken parts & mismatched earrings.
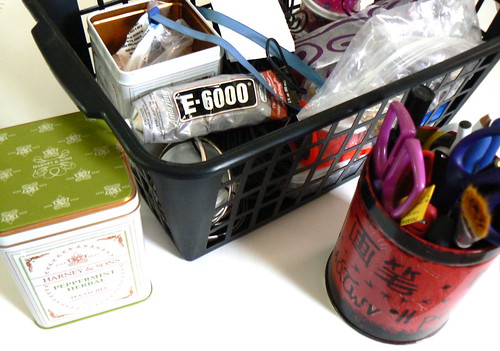
Step 2: DECONSTRUCT ! (needle-nose pliers used here)
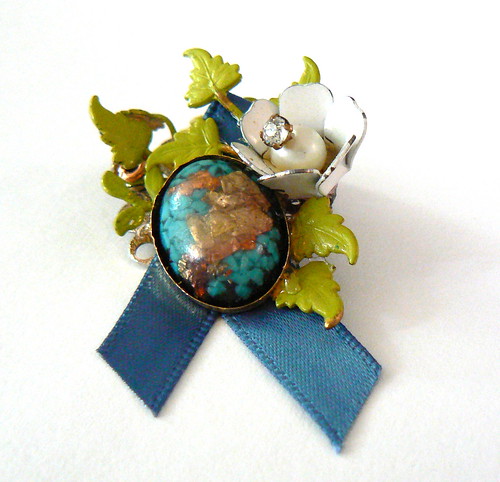
Step 3: ReCONSTRUCT! (here’s where your imagination & glue come in)
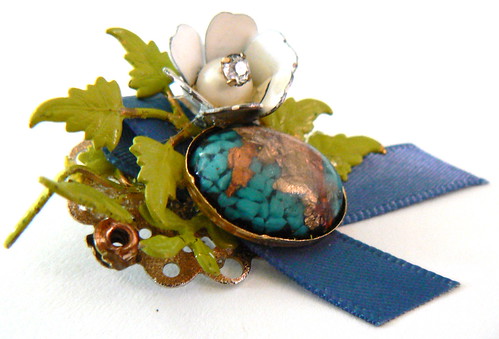
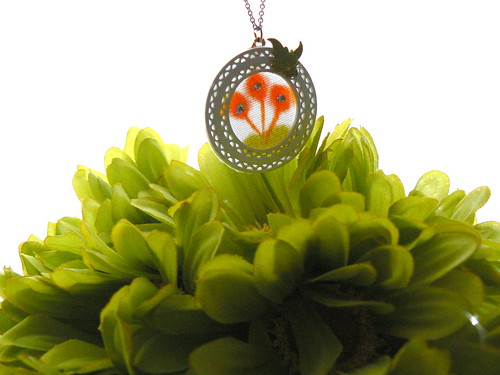
For the medallion
All the steps are the same, but I used fabric that I drew a simple design on for the back of the medallion. That way light can shine through it .
Draw a picture
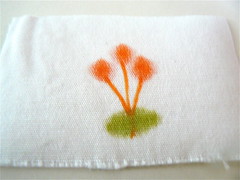
Assemble
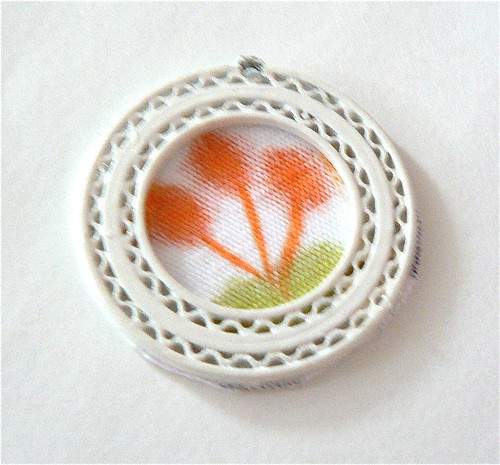
Embellish & add backing

*Kelly*


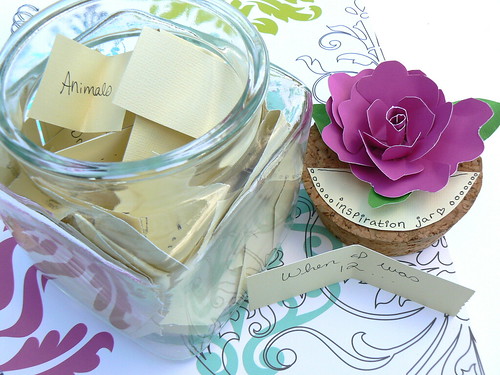
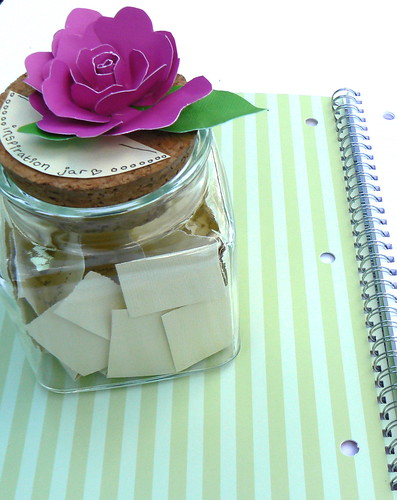
Since becoming a mom, and this year being my first Mother’s Day to celebrate, its become a different holiday to me. I realized that certainly takes a lot to be a parent, and I havn’t even been at it for 4 months yet. I also realized that it been the best experience. I have always been grateful for my parents, but I am especially grateful in a new way.
So this year I wanted to give my mom something I really thought was special. I saw the tutorial from Dana’s Amazing blog, MADE. I read her blog daily. Its an inspirational jumping-off point for journal writing. You pull out a prompt, and write about whatever comes to your mind.
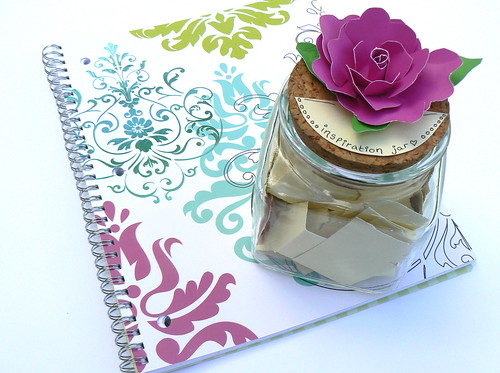
*I found the jar for $1.00 at the Salvation Army
*I made the flower on top with scraps of card stock and E6000, which is the best glue!
*The scraps inside are a mix of suggestions from the tutorial and ideas I had.
*The notebook was $2.00
Total project cost varies : about $3 – $10 (if you don’t have any of the supplies)
I’m excited to see what she comes up with.
*Kelly*

This is such an exciting time of the year for us! Gardening Season!
Here is the layout this year, more to come with updates as they get more and more pretty. how does stromectol work
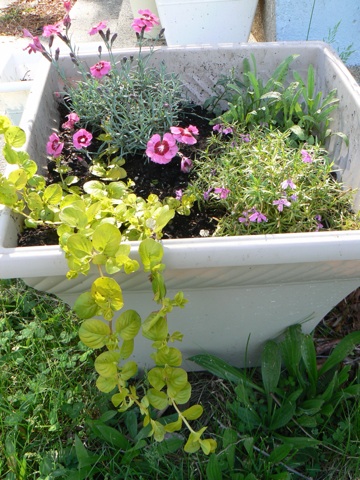
planter box with mosses & other lovelies
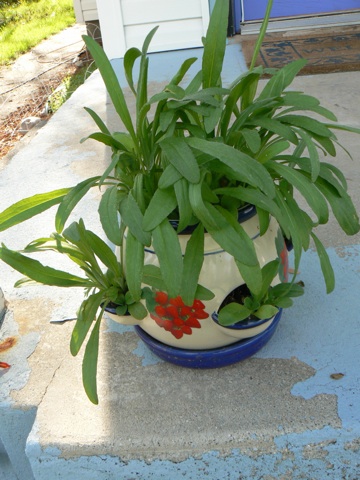
strawberry planter with wildflowers growing
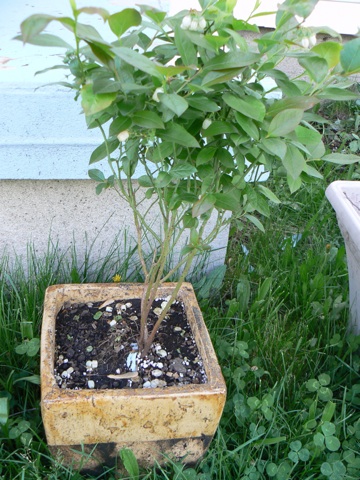
blueberry bush, its first year
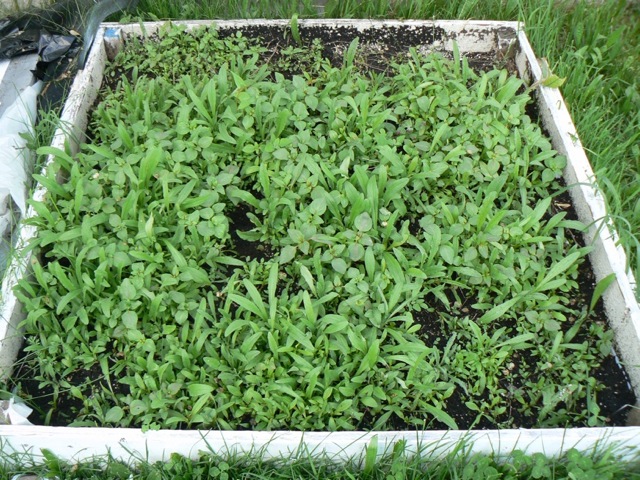
a raised bed of many, many wildflowers
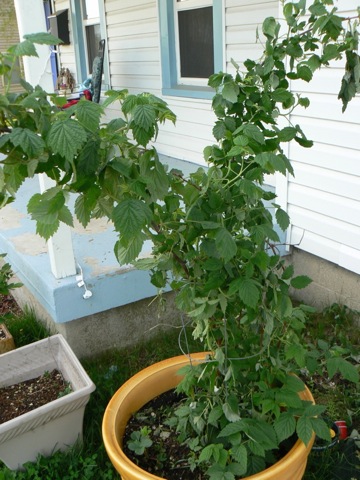
raspberry bush, 3 years strong !
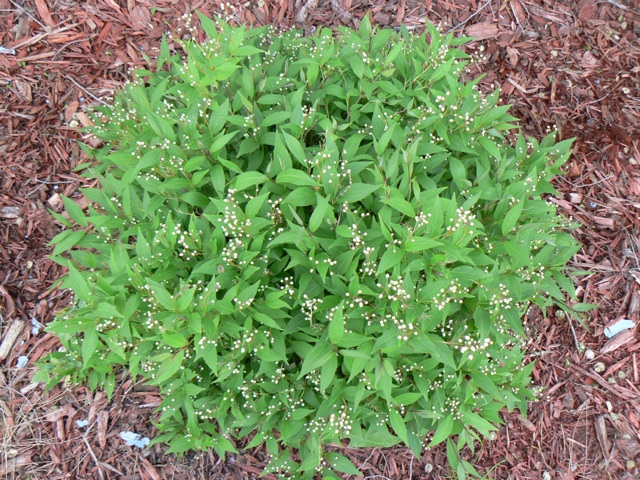
the small bush with white flowers that still remains nameless
the hoop house contents, so far
*Kelly*
My drawing “Day9” that I did on my 9th day of bedrest was PUBLISHED!!
If you can, get your hands on this year’s copy of Cellar Roots 39th Edition . My drawing is full color, full page . ivermectin philipines I was so excited to hear that it was selected. can pugs be given ivermectin Last night, we went to the celebration dinner they had for those who were selected and Judah was the star of the show with everyone talking to him, even the hosts were making Judah apart of their speeches. how long can i take ivermectin topical
🙂

*Kelly*

I put off doing some crafts because I was scared of doing eyelets ! WELL NO MORE!! I have finally did it and I have been successfully doing eyelets since 2008 😉 and now YOU can do the same :
*enter some very amped music*
ITS THE! EYE OF THE TIGER, it’s the cream of the fight
Risin’ up to the challenge of our rival
And the last known survivor stalks his prey in the night
And he’s watchin’ us all in the eye of the tiger
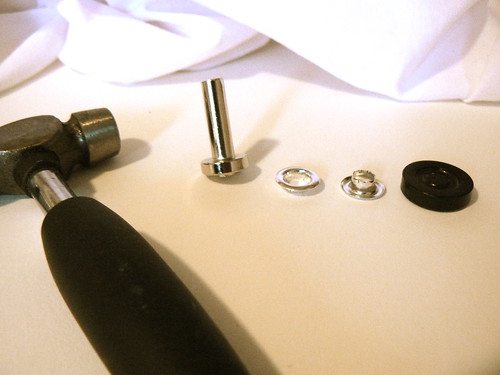
Eyelet Tutorial
Materials :
Eyelet Kit
Hammer
Scissors
Fabric to be eyelet-ed
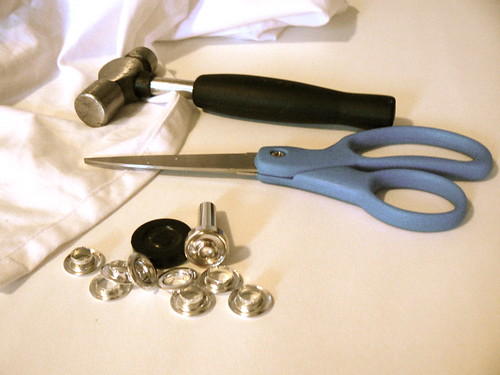
Step 1 : get an eyelet kit from the craft store (aka: mother ship) Make sure to get NOT the refill kit with just the eyelets. You want the one with the hammer accessories.
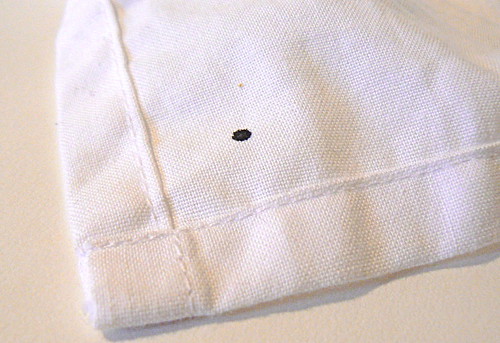
Step 2: Mark where you want your eyelet to go. Preferably inset enough from the seams that you wont risk ripping or tearing when pressure is added to the eyelet.
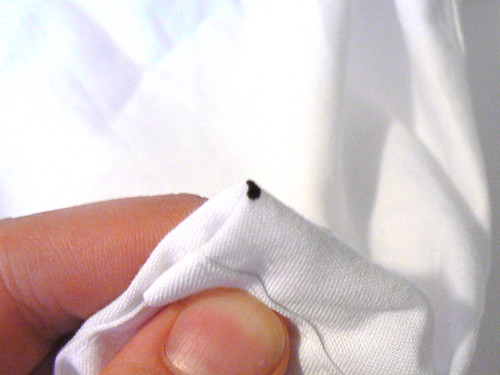
Step 3: fold the fabric area in half, then half again, to make that pointy triangle right where your mark is

Step 4: VERY IMPORTANT: DO NOT cut too big of a hole. Just Baaaaarely snip it. (remember, you can always subtract fabric) make a teeny tiny hole (trust me, it comes out bigger when you unfold it, plus you don’t want the hole to be too big so the eyelet can actually attach to the fabric)
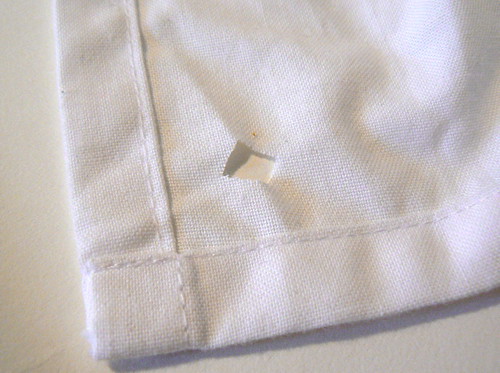
Step 5: unfold. seeee? that’s a pretty big hole for a teeny tiny sniplet =)
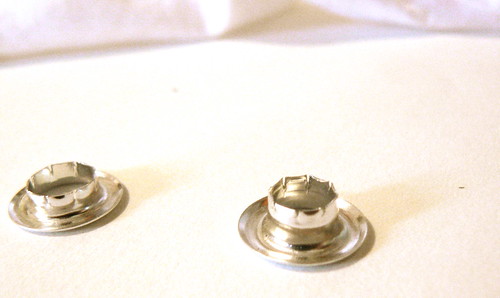
There are two parts to the eyelet: let’s call them male & female 😉 (the male is the protruding one)
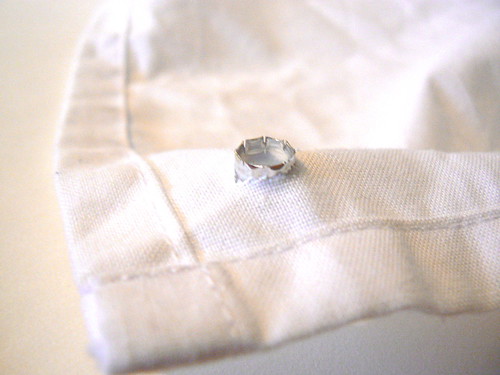
Step 6: Place the eyelet
Step 7: This is the order to assemble the eyelet sandwich -if you will- from TOP to BOTTOM
Hammer on top of the “hammer accessory”
the female eyelet on top of the fabric on top of the male eyelet
the that all sits on the holder on top of the table
Step 8: Hold the “hammer accessory” on the now-made eyelet sandwich and HAMMER HAMMER HAMMER (watch out for the fingers!)
and…
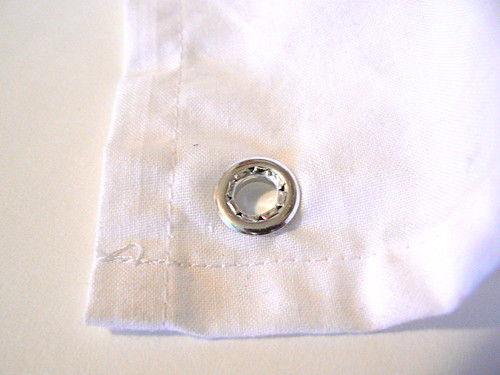
TADA!
Fear those eyelets no more!
*Kelly*
Helloo I’m so excited to show you Judah’s nursery I recently finished decorating (for now) hehe =D
He is 12 weeks old now.

Judah ( a little slumped over because it was right before his nap ) enjoying his bachelor pad. does ivermectin treat babesia I painted the mural that’s behind him, the painting of the beluga whale on the right and made the curtains, too

I made this banner by cutting out shapes out of cardstock then sewing them together. I used a fairly long stitch and loosened the tension. I fed one through, stitched it, kept the machine stitching for a few moments, then fed the next one through. Super easy & FUN

This is his name made out of the same cardstock . I stitched the two color layers over top of each other instead of gluing them for a more fun effect. worm cat with ivermectin


Some of his toys and books. We asked people to give him books with a special message written inside in leu of cards because cards get thrown away and are almost as expensive as kids books anyways. ivermectin & albendazole tablets

His wooden colored rings set & his piggy bank grandma gave him
AND THE BEST PART!!!

JUDAH!! ;D ;D ;D ;D
comments welcome!
*Kelly*
Hello ;D
Judah is 3 months old and growing faster than I could have ever imagined. We have lots of outgrown clothes so I made him a big stuffed jingling ball to play with out of some recycled clothes he’s grown out of.
enjoy 😀
comments & crit welcome


*Kelly*
I made these lanterns for a great, very low budget Halloween decoration. قوانين بلاك جاك I love Halloween, so I made these for the parties I am throwing this year.
I included this tutorial I made, so everyone can enjoy these 🙂

First the materials you will need are large paper lanterns like these:

Wide, satin, wire ribbon:

Scissors
Green floral wire
Paints, Markers, paint brushes

So first, I made pumpkins and skulls
For the pumpkins, I painted the lanterns orange with two coats of thinned acrylic paint

While they dried, I drew on the faces for the skulls. I wanted to make them pirate skulls. العب بوكر I took blue card stock construction paper and measured a few inches on either side of the skulls for their hats.

I drew out two hat designs, one for each pirate


I painted the card stock black for the pirate hats because I didn’t have black paper. Then I painted a Jolly Roger on one, with googly eyes

I fitted the hat on the skull and attached them to the side with wire, using the wire supports inside the lantern to attach the wire to.

The orange ones were dried, so I drew and painted faces on them

Then I took about 5″ of the green ribbon and twisted it around to look like a stem for the pumpkins


I wrapped one end of the twisted ribbon around the lantern support on the top


Next, I cut 4-5 leaves for each pumpkin. I cut out a basic leaf shape


I cut about 4″ of wire. I stuck one end at the bottom of the leaf then twisted it around. لعبة بلاك جاك اون لاين I added 3-4 more leaves to the wire, wrapping them as I went


I wrapped the wire w/the leaves around the same place the stem was.

This is the final product!! Enjoy! Comments & crit welcome


*Kelly*
Hello 🙂
This is my first spring in my new house and we have done some serious construction. We are almost done *tons of pictures to come on that*
but here is my hoop house and raised bed that I made for my garden. I will cover the bottom of the raised bed’s floor with ** moist newspaper to prevent weeds and I will close off the ends of the house with the same netting. I made it so one side stays put permently and the other side draws up like a Roman Shade.
enjoy! comments and crit welcome


Hi Everyone
My fiance and I are remodeling our foreclosure house and we finally got all drywall done and painted.. AND central HEAT =) **in these michigan winters, heat is sometimes important**
anyways, here is the mural I did in my craft room.. enjoy <3


Comment and Crit welcome
*Kelly*
Since my last post, I gave birth to my beautiful son, Judah Loyd Goodman on January, 23rd 2010.

He’s the light of my life for sure. Nathan and I couldn’t be happier.
I am breast feeding and I really do enjoy it for many reasons: the bonding, the convenience, the health for Judah, its free & really easy! I would by far recommend breast feeding to every woman, its amazing. When I’m gone, I have expressed milk so Nathan can care for Judah if I’m out for a few hours. To make sure he’s getting enough food, even though I practice “on demand” feeding, I made a chart to keep us on track:
download the pdf for the feeding chart
download it and print it for a pregnant friend or have for your little one.

*Kelly*
Got great news today at the Drs. como tomar ivexterm 6 mg Basically, I’m back to my original birth plan with my midwife, so to celebrate, here’s some art I have made recently. Enjoy!


Here is a list of ideas of things you can do while on bed rest. Since I am on bed rest (and have been since October 20th, I have contemplated the pros & cons of it a lot)
We’ll start with the CONS, since ending with the PROS makes things better =)
CONS
* can’t go anywhere besides the Dr. .. you’re life revolves around the Dr’s office.
* Not knowing what day it is because it doesn’t matter either way
* Not being able to get up to fix something I.E. : A burned out light bulb you’ve been staring at for weeks 0.0
* When you do get up, your feet tingle from a crazy sensation they haven’t felt in a while -( blood flow … )
* No sexual activity – that’s a no brainer in the CONS category.
* asking everyone for everything
(i’m sure I could think of more, but you get the idea)
PROS =D
* appreciating the outdoors more than ever before!
* not having to go out in freezing weather
* not having to run errands
* people expecting your house to be dirty
* if you have cable, you can veg in front of the TV all day and everyone is happy you’re doing it!
* people come to see you, which is awesome
* video games are pretty awesome
So i can think of more pros, too.. but I want to get to the point of new activities to do while on bed rest..
Since your bed is now your dining room, craft table, sleeping area, couch, entertainment area & personal grooming center, there are a few dos & don’t first.
DO- have these items by your bed side : an interesting book, a pair of scissors (trust me), water w/ a straw, your vitamins & nightly routine stuff, CHAPSTICK, a pen & some paper, & your wallet
DO – keep your sheets as CRUMB FREE as humanly possible
DO – shower as often as possible
DO – make your bed (if you can) every so often… giving a little fresh start
DEW – Move the bed into the most social area of the house
DO- Change your clothes every day, like a normal person =)
DONT – use paint in the bed…
DONT – call ppl everyday just to chat.. no one likes that
DONT – spill anything on the bed.. remember – its your WHOLE WORLD .. get spaghetti sauce everywhere? now your WHOLE WORLD is covered in a red, oily sauce .. get used to it
DONT- keep updating and refreshing Facebook every 2 minutes.. nothing is THAT interesting..
So recent activities I have found to keep occupied while on bed rest:
– reading magazines has become a great past time.
– reading informational books ( Fiction books make me really sleepy since I’m not learning anything)
– doing paper crafts
-admire a Christmas Tree and have all the interesting-looking ornaments hung where you can see them
– write out thank-you notes or any other tedious activity that you may have been putting off.
-play Catch Phrase!
– Instead of just zoning on the TV, play this game I made up – Go back and forth with someone going A-Z down the alphabet while watching tv. When you get to the next letter, you have no name something that is CURRENTLY on the screen with that letter.. GOOD LUCK WITH X & Z…
– learn which commercials annoy you so you can have MUTE on standby
– do some online shopping, or online Window Shopping..
– catch up on some movies you have been missing or meaning to watch
– draw!! everyone should draw
– play the tambourine
– invite people over for a sleepover (doesn’t matter how old you are)
– put a photo album together
– organize anything you can put in your lap.
– RESEARCH EVERYTHING YOU THINK ABOUT !! so much time on your hands, get a little smarter everyday..
– update your blog with stuff barely anyone will read
with anything you do, take your time and put care into it, even if its writing out a check to the power company because, let’s face it – what else do you have to do??
Paper Crafts!!


*Kelly*