by Bridget | Jul 9, 2015 | art, Crafts, diy, retro party ideas, Safari Party Ideas
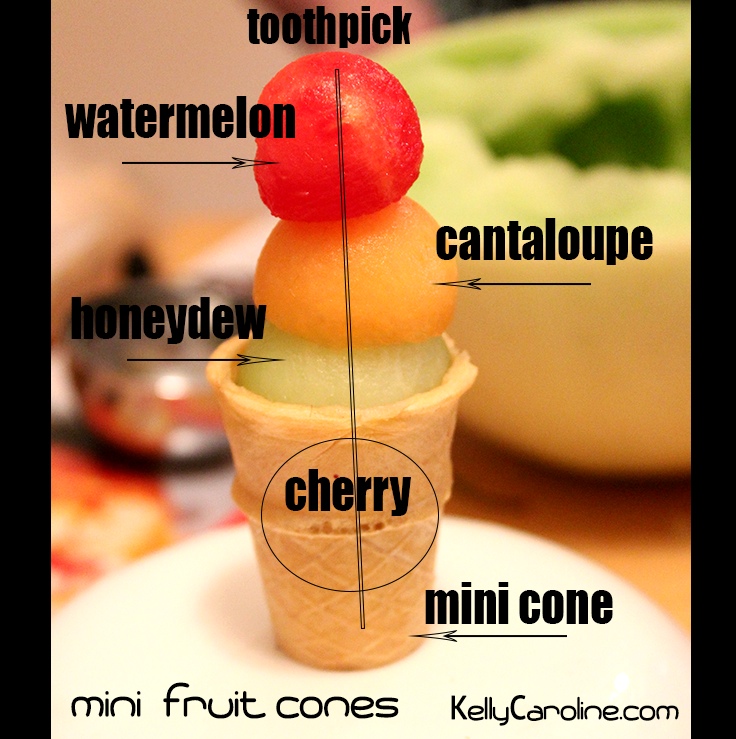
How to make Mini Fruit Cones
Anyone who knows me, knows I cannot cook. However, I do get creative food ideas every once in a while, so they need to come out! This one I am particularly happy with. I was in charge of bringing the fruit to a 4th of July party, so I needed to think of a more creative way to present it than just a bowl. And DING! a light goes off- mini fruit cones ! I worked out the idea in my head, then made it happen. Here’s the tutorial for the perfect party snack Mini Fruit Cones
Mini Fruit Cones tutorial – How to display fruit for a party
Mini Fruit Cones
Supplies needed


Joy Mini Cups; Mini Ice Cream Cones for Kids, 42 Count (1 Box (42 cones))


Norpro 5135 Double Melon Baller


OXO Good Grips Melon Baller


Good Old Values Bamboo Toothpicks, Pack of 1000
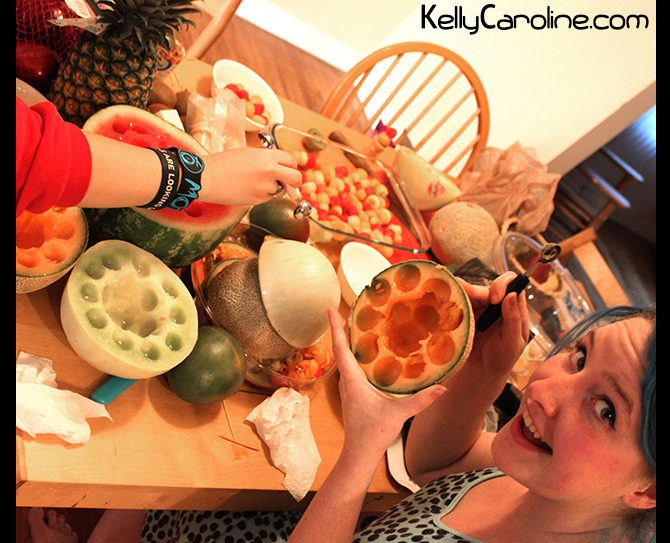
Step 1
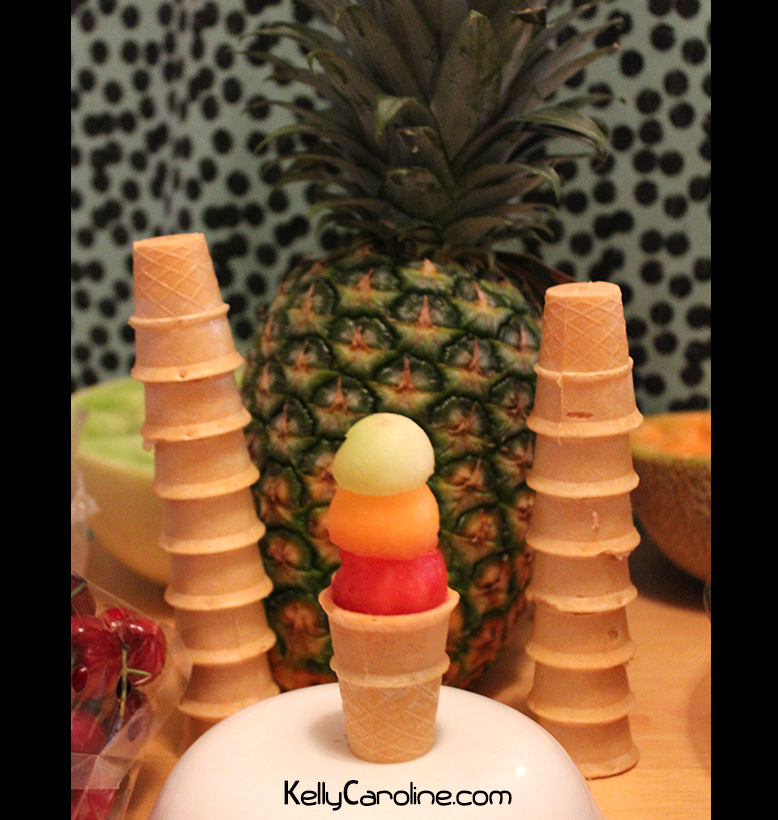
First, cut all the fruit you want – I went all melon because then it looks like ice cream, but you can use any fruits. Clean them, cut them into workable sizes, and start BALLING ! We kept all the sizes in separate bowls so it made assembling easier.
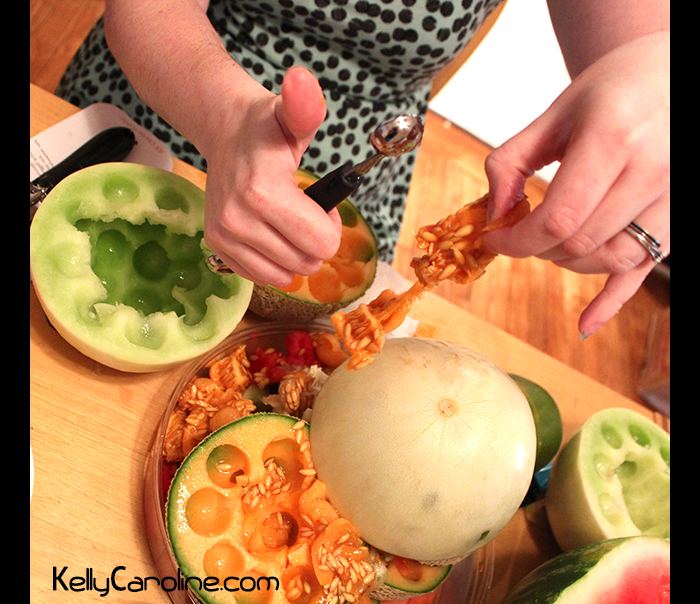
Step 2
And you will have lots of fruit leftover that looks like rotary dial phones! (we cut up that fruit and served it in a large bowl and it was yummy)
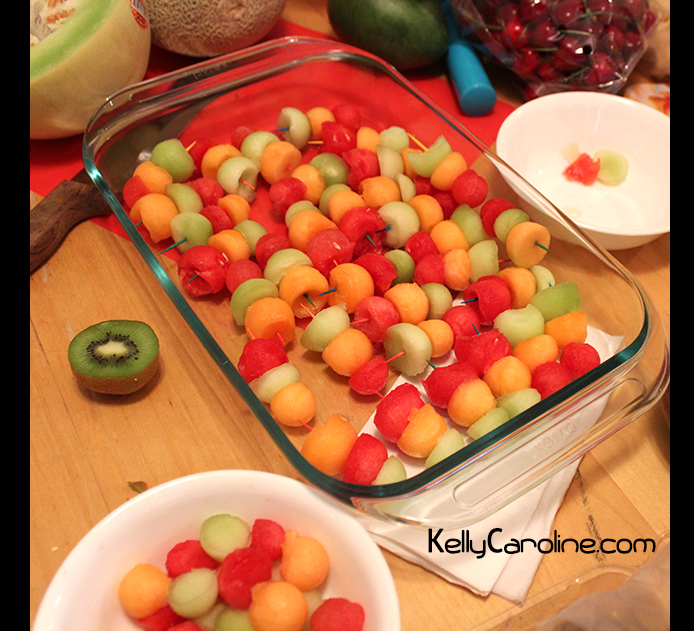
Step 3
Here is the dish of fruit kabobs we assembled. We mixed up what fruits were on the top and bottom, too. In the bottom of each cone, though is a cherry de-stemmed.
Most Important Tip! The kabob assembly can be done the night before, but wait to place the kabob in the cone until the day they will be served because the cone will get soft after 3 hours.
And ta-da! Mini fruit cones assembled and ready to be loved!
by Bridget | Jan 22, 2014 | art, clothing, Crafts, Henna
Bleach Pen Dress – Henna Design
Hello All!
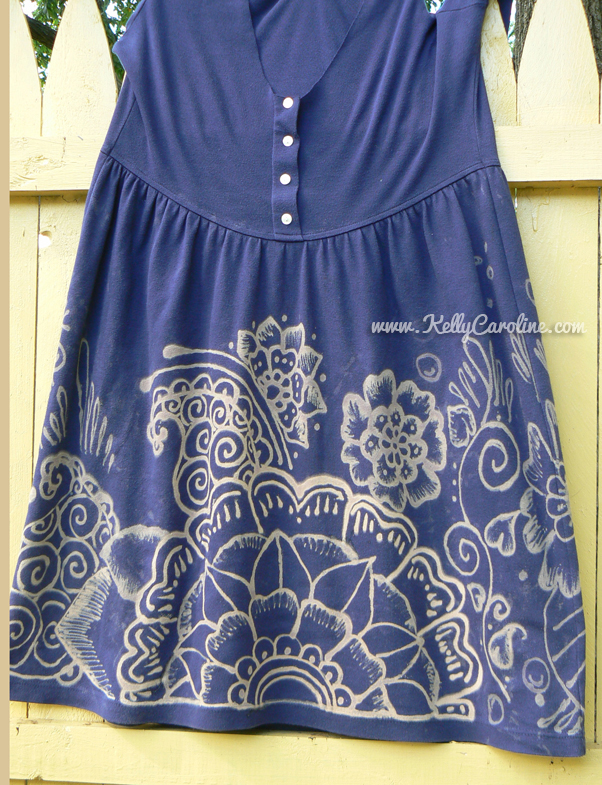
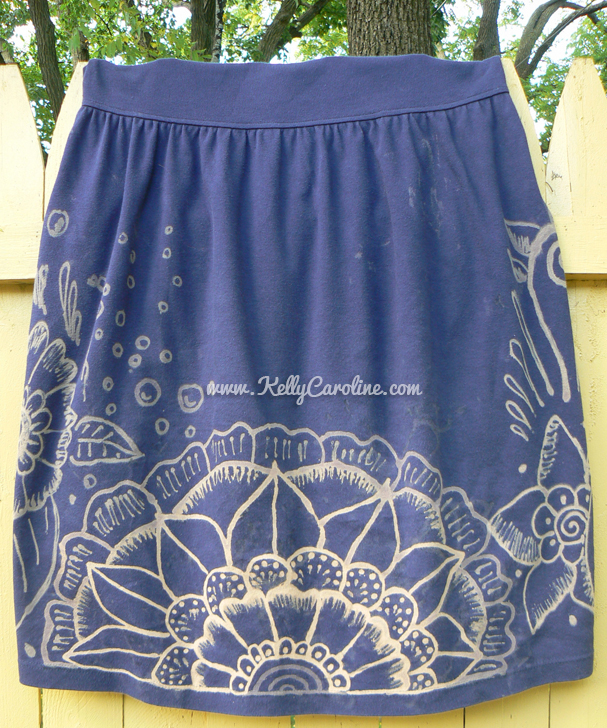
I got this simple navy blue cotton dress for $0.80 from the thrift store! It was a great buy, but a little plain for my taste. I saw some tutorials for bleach pen decorating, so I went out and got a few Clorox Bleach Pens at the supermarket.
The bleach comes out as a paste and since I’m a henna artist, it easily translated into a medium I am already comfortable working with.. pierre kory ivermectin 🙂
I did one side at a time. I put a piece of cardboard between the two layers of the dress as I carefully squeezed the bleach onto the dress. I just free-handed the design. no planning involved here.
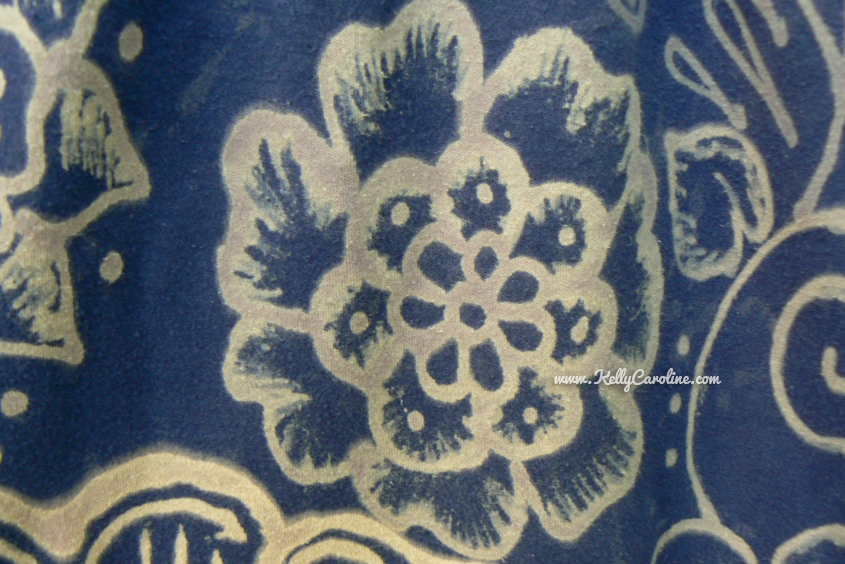
I let the bleach sit on the fabric for 5 minutes then immediately washed it with cold water in the tub. Then I ran it in my washer on a quick spin so it came out slightly damp, but not dripping wet.. and repeated the process until it was all done!
I just feel like the design I did made it into a permanent piece of henna art! safe ivermectin dose rabbits
and here are the pics of the bleach pen dress ! c&c welcome!!
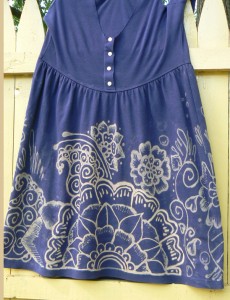
That’s the front
bleach pen decorating designs – henna style
And the back of the dress
the back of the bleach pen dress
detail of one flower to show that you can get shading especially if you leave the paste on for different amounts of time.
bleach pen decorating detail
and it on.

henna style bleach pen dress
by Bridget | Sep 28, 2011 | Crafts, Henna
Hello All!
I got this simple navy blue cotton dress for $0.80 from the thrift store! It was a great buy, but a little plain for my taste. I saw some tutorials for bleach pen decorating, so I went out and got a few Clorox Bleach Pens at the supermarket.
The bleach comes out as a paste and since I’m a henna artist, it easily translated into a medium I am already comfortable working with.. 🙂
I did one side at a time. I put a piece of cardboard between the two layers of the dress as I carefully squeezed the bleach onto the dress. I just free-handed the design. no planning involved here.
I let the bleach sit on the fabric for 5 minutes then immediately washed it with cold water in the tub. Then I ran it in my washer on a quick spin so it came out slightly damp, but not dripping wet.. and repeated the process until it was all done!
I just feel like the design I did made it into a permanent piece of henna art!
and here are the pics! c&c welcome!!

That’s the front

and the back

detail of one flower to show that you can get shading especially if you leave the paste on for different amounts of time.

and it on.
<3 Kelly Caroline


